Alert Logic Managed Web Application Firewall (WAF) for SoftLayer

Alert Logic shares the Managed WAF image
Alert Logic completes this step.
Get the Managed WAF image
Before you begin, you must retrieve the Image ID/Name from the Alert Logic provisioning engineer.
To get the image:
- Log in to the SoftLayer portal.
- Navigate to Devices > Manager > Images.
- Find the Alert Logic shared image.
-
Click the corresponding Actions button and based on your needs, select either Order Monthly Virtual Server or Order Hourly Virtual Server.
-
In the window that appears, click Show for each configuration option, and make your desired selections.
-
Click Continue Your Order.
- Review your order details, complete the missing fields, including payment information and click Finalize Your Order.
Enable inbound traffic
The Managed WAF appliance is now enabled; however, you must enable inbound traffic. Use the login credentials you received during the onboarding process to access the Alert Logic user interface.
To enable inbound traffic:
- At the top of the Alert Logic console, from the drop-down menu, select WAF.
- In the left navigation, under Manage, click Appliances.
- Click Manage Appliance.
- Under System, click Interfaces. Select Inbound traffic.
Add a website
There are four major steps to complete:
- Access the Add Website page
- Modify the vritual web server section
- Modify the real web servers section
- Modify the Initial configuration section
Step 1: Access the Add Website page
To access the Add Website page:
- At the top of the Alert Logic console, from the drop-down menu, select WAF.
- In the left navigation, under Manage, click Appliances.
- Click Manage Appliance that corresponds to the desired virtual appliance.
- In the left navigation, under Services, click Websites.
- Click Add Website.
Step 2: Modify the virtual web server section
In this step, add the website you want to protect. Managed WAF is deployed in reverse proxy mode. In reverse proxy mode, Managed WAF terminates requests and proxies the requests to the backend web server.
To modify the virtual web server section:
- In Add Website, from the Web Server Protocol list, select one of the following:
- HTTP: This option creates a website proxy that responds to HTTP requests.
- HTTPS: This option creates a website proxy that responds to HTTPS requests. Selection generates a temporary SSL certificate.
- Both: This option creates a website proxy that responds to HTTP and HTTPS requests. Selection generates a temporary SSL certificate.
- In Web server domain name, type the URL of the website you want to protect.

- In the Listen IP left column, do one of the following:
- Select an IP, and then click Add to add this IP to the Active Listen IP list in the right column. You can add more than one IP to the right column.

- If the left column includes multiple IP addresses, you can select All Inbound, and then click Add to add all IP addresses to the Active Listen IP list in the right column. This option allows the virtual web server to listen to all IP addresses configured to accept inbound requests.

- In HTTP(S) listen port, type the port. The default ports are as follows:
- HTTP: 80
- HTTPS: 443
Selection of Both from the Web Server Protocol list makes both the HTTP and HTTPS boxes available.
- Select Default Host for listen IP.
When enabled the virtual host responds to all requests for the virtual host not configured as the primary host name or as a virtual host for other proxies listening to the same IP address. The Test your website proxystep assumes this option is selected. This behavior is convenient for testing since it will send any request that is not a policy violation to the backend web server.
Step 3: Modify the real web servers section
Use the real web servers section to identify any backend web server to be protected by Web Security Manager.
To modify the real web servers section:
- From the Real web server protocol list, select the connection protocol you want Web Security Manager to use for to a backend web server.
- If you want traffic to a backend web server(s) to be encrypted, select https or both.
- If traffic does not require encryption, select http.
- Select Validate real servers if you want Web Security Manager to send an HTTP request to the backend web server to verify it responds to HTTP requests.
Clear the check box if the backend web server is not yet running.
- In Real server IP or public domain name, type the private IP address or DNS name on which the web server is listening.
- In Port, type the port on which the web server is listening . The default ports are as follows:
- HTTP: 80
- HTTPS: 443
- From the Role list, select one of the following:
- Active: Web Security Manager forwards requests to the backend web server.
- Backup: Web Security Manager forwards requests to the backend web server only if no other servers are active.
- Down: Web Security Manager does not forward requests to the backend web server.
Step 4: Modify the Initial configuration section
To modify the initial configuration section:
- Under Initial configuration, make sure WAF Default is selected.
You can return to this option if you need to make changes.
- Click Save Configuration, and then click Apply changes.
You can return to this option if you need to make changes.
- Click Save Configuration, and then click Apply changes.
Test your website proxy
You must test to verify Managed WAF can connect to the backend web server.
The following walkthrough assumes you have configured your website to be used as the default virtual host for the listen IP. You should also make sure that your website proxy is in Detect mode.
There are four major steps to complete:
- Edit the local hosts file
- Test for initial connectivity
- Test in Detect mode
- Test in Protect mode
Step 1: Edit the local hosts file
Edit the local hosts file to test traffic routed from the host provider through Managed WAF. This achieves the same result as reconfiguring NAT rules or making a host provider DNS change, but only the local PC is affected. This allows you to test Managed WAF prior to making a permanent NAT or DNS change.
To edit your local hosts file:
- Locate your hosts file. The host file can typically be found in the following locations:
- For Windows PC users: %SystemRoot%\system32\drivers\etc\hosts
- For Unix/Linux/Mac OS users: /etc/hosts
- Copy and save your original hosts file to another location.
- Edit the hosts file and route the host provider (www.example.com) through the Managed WAFweb application firewall (WAF) listen IP address (192.0.43.11).
- Save the hosts file.
- Once you complete testing, replace the edited hosts with the original hosts file.
Step 2: Test for initial connectivity
To test for initial connectivity:
- In your web browser's address bar, type your public web server IP, and then press Enter. The browser should open the default website for your Real web server. This test will not affect production traffic.
Step 3: Test in Detect mode
To test in Detect mode:
- In your browser's address bar, type your public web server IP followed by /?x=a%00, and then press Enter.

www.example.com/?x=a%00
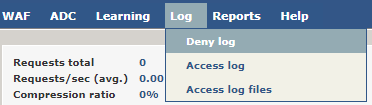
The browser should open the default website for your Real web server and the simulated DOS attack should be registered on the Deny log as a DOS attempt.
- On the Websites page, in the main menu, point to Log, and click Deny Log. To view details of any Deny log entry, click the Details icon (
 ).
). 
Step 4: Test in Protect mode
To test Protect mode:
- Open the Websites page.
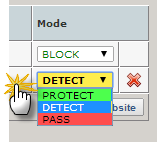
- In the Websites list, for the website you want to test, in the Mode list, select Protect.
-
In your browser's address bar, type your public web server IP, followed by /?x=a%00, and then press Enter.
www.example.com/?x=a%00
The browser should show a 404 error message. This attack should also be registered on the Deny log as a DOS attempt.
Route traffic through Managed WAF
After you have tested your website proxy, reconfigure NAT rules or make a host provider DNS change to route traffic to Web Security Manager permanently. DNS changes may take several days to propagate properly through the Internet domain servers. Once you have completed these initial steps, you can begin working with Managed WAF by adding additional sites to protect.