Manage your SSL Certificates
When you create an SSL website, Alert Logic Managed Web Application Firewall (WAF) gives this website a temporary SSL certificate. You are able to substitute the temporary certificate with a signed certificate. These actions are only intended for SSL enabled website proxies. To create an SSL website, see Add a website. For more information about configuring a website, see Configure Alert Logic Managed Web Application Firewall (WAF).
Export an SSL certificate
When you create a website proxy for an existing HTTPS web server, you need to export the SSL certificate from the web server, and import the certificate to Managed WAF.
Managed WAF supports the imports of the following formats:
- PKCS12 (or PFX): The standard format used by Microsoft IIS servers. It stores public key, private key, and the key chain in one single encrypted file.
- PEM: Commonly used in *nix based web servers like Apache and Nginx. When ordering certificates, this format is often referred to as “Apache format.”
The links below open procedures that refer to third party products and guidelines and may change at the vendors discretion.
The following options show you how to export an SSL certificate from the most common servers:
Export an SSL certificate from a Microsoft IIS server
When you export an SSL certificate from a When exporting Microsoft IIS server, the certificate is usually obtained in PKCS12 (.pfx) format. The instructions for exporting from IIS 7 below will include the SSL certificate chain.
Add the certificate
- Open the Windows Start menu. In the Search box, type MMC and click OK.
- Click the File tab and then select Add/Remove Snap-in.
- Click on Certificates, and then click Add.
- Select Computer Account, and then click Next. Select Local Computer and click Finish.
- Select Local Computer, and click Finish.
- Click OK to close the Add/Remove snap-in window.
- In the center pane, double-click Certificates (Local Computer) in the center window.
Export the certificate
- Double-click on the Personal folder, and then click Certificates.
- Right-click the certificate you want would like to backup, and then select ALL TASKS and then Export.
- Follow the Certificate Export Wizard to backup your certificate to a .pfx file.
- Select Yes, export the private key.
- Select Include all certificates in certificate path if possible.(do NOT select the delete Private Key option).
- Type a password you will remember, and then save the file.
- Click Finish. You will receive the following message, "The export was successful."
- Click OK.
Export an SSL certificate from an Apache server
For Apache-based web and application servers with default PEM encoding, the SSL certificate can be copied directly from the file system and imported “as is” when the default PEM encoding is used.
Obtain the SSL-certificate file from the web servers file system. By default, the file is PEM-encoded.
The exact location may vary, but the Apache config file (httpd.conf) will show the exact location as in the example below:
<VirtualHost 192.168.0.1:443>
DocumentRoot /var/www/html2
ServerName www.yourdomain.com
SSLEngine on
SSLCertificateFile /path/to/your_domain_name.crt SSLCertificateKeyFile
/path/to/your_private.key
SSLCertificateChainFile /path/to/CA_chain.crt
</VirtualHost>
SSLCertificateFile is the server public key
SSLCertificateKeyFile is the server private key
SSLCertificateChainFile is the certificate chain
Keep the contents of the files open. You will need it for the PEM (Apache) certificate upload section.
Upload an SSL certificate
When you create an SSL website, Managed WAF assigns the website a temporary SSL certificate. You are able to substitute the temporary certificate with a signed certificate.
You can do this from the Manage Certificates page:
-
In the Alert Logic Console, click Configuration, and then click the web application firewall (WAF)
-
In the left navigation pane, click Appliances.
- In the item row of your appliance, click Manage Appliance.
- On the Manage Appliance page, in the left navigation pane, under Services, click Websites.
- On the Websites page, select the website you want to view.
- In the main menu, highlight ADC, and click Virtual Host.
- Click Manage Certificates. The SSL certificate currently in use is displayed. To upload a new certificate, click Manage certificates.
PKCS12 (Microsoft IIS) certificate upload
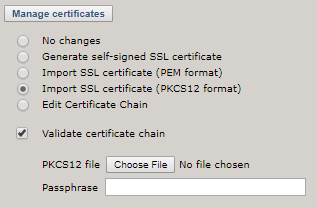
- In the Options list, select Import SSL certificate (PKCS12 format).
- Click Choose File to browse your system for the file location.
- In Passphrase input, type the passphrase.
- Leave Validate certificate chain selected.
- Click Save Settings in the lower right corner of the page.
- Click Apply Settings at the top of the page to apply the certificate to the run-time configuration.

PEM (Apache) certificate upload
- In the SSL certificate section, click Manage certificates.
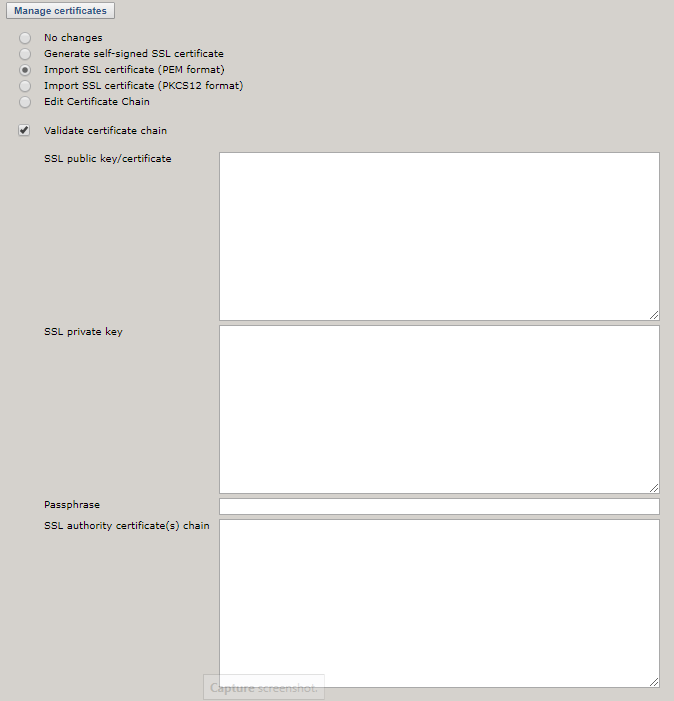
- Select Import SSL certificate (PEM format).

- Open the .PEM file(s) in a text-editor. When obtained from the web server, the following extension convention is usually used:
*.crt – public keys, both server and CA chain
*.key – the private key
- Copy the public certificate section of the certificate into the SSL public key/certificate field.
The public certificate is the section of the certificate file between (and including) the certificate start and end tags.
-----BEGIN CERTIFICATE-----
Certificate characters
-----END CERTIFICATE-----
- Copy the (SSL) private key section of the certificate into the SSL private key field.
The (SSL) private key is the section of the certificate file between (and including) the private key start and end tags.
-----BEGIN RSA PRIVATE KEY-----
Private key characters
-----END RSA PRIVATE KEY-----
- In the Passphrase, field type the passphrase for the private key (if the original private key was encrypted).
-
Leave Validate certificate chain selected.
When checked, Managed WAF validates that the certificate chain is complete and ordered correctly. This option should only be cleared if the certificate import is generating certificate chain errors that need to be adjusted manually after import. - Click Save Settings in the lower right corner of the page.
- Click Apply Settings at the top of the page to apply the certificate to the run-time configuration.
- (Optional) In SSL authority certificate(s) chain, if a certificate authority chain is provided with your certificate, enter the entire list of certificates (more than one certificate may be provided).
- Click Save settings. The imported certificate is displayed in the certificate table along with the certificate chain (if any). Verify that the certificate is imported correctly.
- Click the Apply settings.
Intermediate certificate upload
- In the SSL certificate section, click Manage certificates.
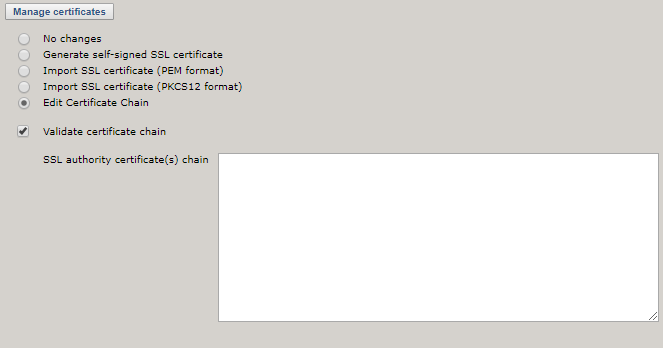
- Select Edit Certificate Chain.

Open the intermediate certificate in a text-editor. When obtained from the web server, the following extension convention is usually used:
The public key/certificate is the section of the certificate file between (and including) the certificate start and end tags.
<-----BEGIN CERTIFICATE--->
Certificate characters
<-----END CERTIFICATE--->
- Click Save Settings in the lower right corner of the page.
- Click Apply Settings at the top of the page to apply the certificate to the run-time configuration.